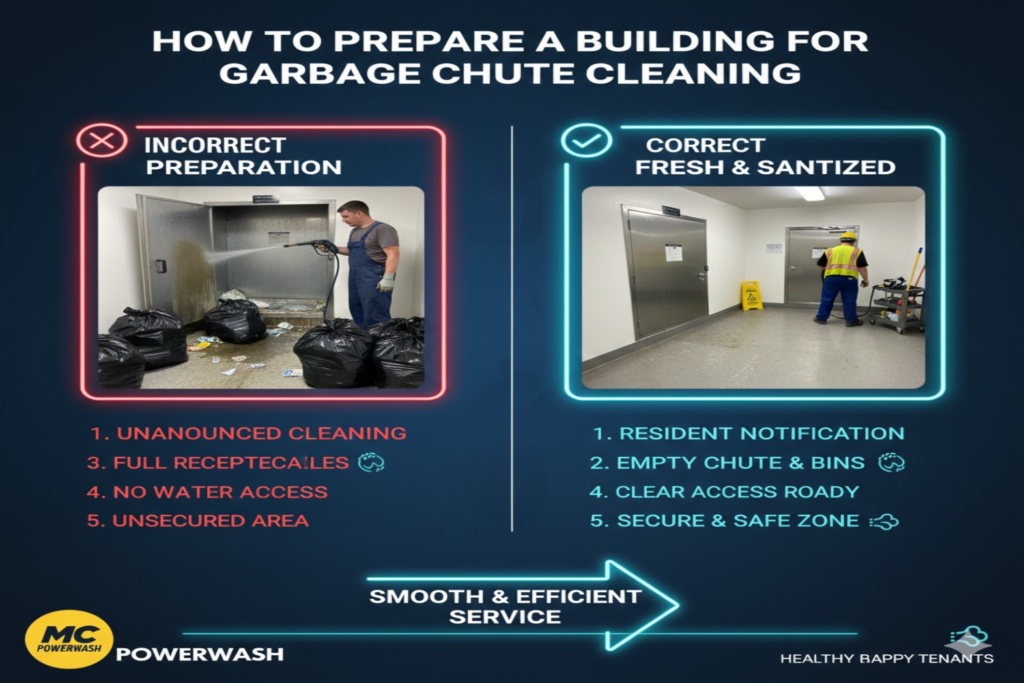
Preparing a building properly before garbage chute cleaning ensures the process is safe, efficient, and minimally disruptive for residents and staff. In Los Angeles, where high-rise apartments, condominiums, and mixed-use towers rely heavily on waste chutes, advance preparation is especially important due to dense occupancy and strict local health and fire codes. Good preparation includes notifying tenants, securing access, isolating the chute system, protecting common areas, and coordinating with the cleaning crew.
Skipping steps can lead to resident complaints, safety hazards, incomplete cleaning, or code violations. A well-organized plan reduces downtime, prevents accidents, and guarantees thorough results. Professional cleaning companies often provide preparation guidelines, but property managers must execute them building-wide. Clear communication and proactive coordination make the difference between a smooth operation and a chaotic one. When done correctly, preparation turns chute cleaning into a routine, low-impact maintenance task.
Use simple language and include visuals (calendar, map of alternative bins). Translate notices into Spanish, Korean, Mandarin, and other common languages. Explain the benefits (better air quality, fewer pests, fire safety). Provide a contact number for questions. Send reminders 1 week, 48 hours, and 24 hours before. Thank residents afterward for cooperation. Clear, repeated communication reduces confusion and misuse. It builds goodwill and ensures smooth execution. Effective resident communication is key to successful preparation.
Why Preparation Is Essential Before Chute Cleaning
Unprepared buildings face resident confusion, unauthorized chute use during cleaning, safety risks from open hoppers, and potential damage to surrounding areas from water or debris. In Los Angeles, where many residents are non-English speakers or have busy schedules, poor notification leads to frustration and improper disposal. Open hoppers during cleaning can cause falls, spills, or exposure to biohazards. Runoff from pressure washing can flood compactor rooms or hallways if not contained. Without coordination, cleaning may be incomplete because access is blocked or residents continue using the system. Proper preparation minimizes disruption, ensures worker safety, protects property, and helps meet health department requirements. It also improves resident cooperation and satisfaction. A structured preparation plan is the foundation of successful chute cleaning.
Use simple language and include visuals (calendar, map of alternative bins). Translate notices into Spanish, Korean, Mandarin, and other common languages. Explain the benefits (better air quality, fewer pests, fire safety). Provide a contact number for questions. Send reminders 1 week, 48 hours, and 24 hours before. Thank residents afterward for cooperation. Clear, repeated communication reduces confusion and misuse. It builds goodwill and ensures smooth execution. Effective resident communication is key to successful preparation.
Step 1: Schedule & Plan the Cleaning in Advance
- Choose a date and time that causes the least disruption—typically a weekday morning or mid-day when most residents are away.
- Book the cleaning company at least 4–6 weeks ahead for high-rise buildings.
- Confirm the scope: full pressure washing, degreasing, deodorizing, enzymatic treatment, etc.
- Determine estimated duration (usually 4–12 hours depending on floors). Get written confirmation of the crew size, equipment, and safety protocols.
- Prepare a contingency plan for rain or delays.
- In Los Angeles, schedule around peak traffic hours to ease crew access.
- Advance planning prevents last-minute conflicts.
- It allows proper notification and resource allocation.
- Good scheduling is the first key to success.
Step 2: Notify Residents & Tenants Early
Send written notice to all residents at least 14–21 days in advance via email, building app, posted flyers, and door hangers. Include the date, time, estimated duration, and instructions not to use the chute during the window. Explain why cleaning is necessary (hygiene, odor control, fire safety). Provide an alternative trash location (designated bins in lobby, parking area, or valet service). Include contact information for questions. Send reminder notices 48 hours and 24 hours before the job. Translate notices into common languages (Spanish, Korean, Mandarin, etc.) for diverse Los Angeles buildings. Clear, repeated communication reduces misuse and complaints. It ensures cooperation and smooth execution.
Use simple language and include visuals (calendar, map of alternative bins). Translate notices into Spanish, Korean, Mandarin, and other common languages. Explain the benefits (better air quality, fewer pests, fire safety). Provide a contact number for questions. Send reminders 1 week, 48 hours, and 24 hours before. Thank residents afterward for cooperation. Clear, repeated communication reduces confusion and misuse. It builds goodwill and ensures smooth execution. Effective resident communication is key to successful preparation.
Step 3: Lock & Secure All Chute Hopper Doors
On the day of cleaning, lock every garbage chute hopper door on all floors using keys, zip ties, padlocks, or out-of-service signs. Post large, visible notices on each door saying “OUT OF SERVICE – CHUTE CLEANING IN PROGRESS – DO NOT USE”. Place additional signage at elevator lobbies and trash rooms. Assign staff or security to monitor floors and redirect residents to alternative disposal areas. Locking prevents residents from adding new waste mid-cleaning. It protects cleaning crew from falling debris. Secured hoppers ensure the chute remains isolated. This step is critical for safety and effectiveness.
Use simple language and include visuals (calendar, map of alternative bins). Translate notices into Spanish, Korean, Mandarin, and other common languages. Explain the benefits (better air quality, fewer pests, fire safety). Provide a contact number for questions. Send reminders 1 week, 48 hours, and 24 hours before. Thank residents afterward for cooperation. Clear, repeated communication reduces confusion and misuse. It builds goodwill and ensures smooth execution. Effective resident communication is key to successful preparation.
Step 4: Prepare the Compactor Room & Bottom Access Area
Clear the compactor room or dumpster area of all obstacles before the crew arrives. Remove the trash bin or compactor drawer to allow full access to the chute bottom. Cover floors, walls, and equipment with plastic sheeting to protect from water and debris. Set up temporary containment barriers for runoff water. Ensure good lighting and ventilation in the access area. Provide power outlets if needed for equipment. Place caution tape and signs restricting entry to authorized personnel only. A clean, protected compactor room allows technicians to work efficiently. It prevents damage to building assets. Proper bottom preparation is essential for complete cleaning.
Step 5: Protect Common Areas & Hallways
Place protective coverings (ram board, plastic sheeting, or drop cloths) on floors near chute doors and in compactor access areas. Set up temporary trash bins and signage in lobbies or designated areas. Post directional signs guiding residents to alternative disposal points. Arrange for extra janitorial staff to monitor common areas during cleaning. Protect carpets, walls, and fixtures from water splatter or debris. Inform security or concierge staff about the schedule. Protecting common spaces minimizes disruption and damage. It maintains building appearance during the process. Thoughtful protection keeps the property clean and professional.
Step 6: Coordinate with the Cleaning Crew on Arrival
- Meet the cleaning team upon arrival and provide access keys, building maps, and any special instructions.
- Review the scope of work, safety protocols, and expected timeline.
- Confirm they have containment systems for runoff and proper PPE.
- Show them compactor room access, roof access (if top-down cleaning), and any restricted areas.
- Discuss resident notifications and locked hoppers.
- Agree on communication during the job (walkie-talkies or phone).
- Escort them to the work area and remain available for questions.
- Good coordination ensures the crew works efficiently.
- It prevents misunderstandings and delays.
- Strong collaboration delivers the best cleaning results.
Step 7: Monitor the Cleaning Process (If Possible)
If permitted, observe key stages (pre-wash inspection, degreaser application, pressure washing, final rinse) from safe distances. Take photos of the chute interior before and after (using access panels or cameras). Note any resident questions or issues that arise. Ensure runoff is properly contained and directed to sanitary drains. Verify that deodorizer or enzymatic treatment is applied at the end. Stay in contact with the lead technician throughout the day. Monitoring shows due diligence and helps catch any oversights. It also provides documentation for records. Active oversight ensures quality and compliance.
Step 8: Post-Cleaning Inspection & Resident Notification
After the crew finishes, inspect the chute interior (using mirrors, cameras, or borescopes) for cleanliness and free flow. Check hopper doors, frames, and compactor room for any missed debris or water. Smell-test multiple floors for residual odors. Take final photos and obtain a completion report from the cleaning company. Unlock hopper doors and remove signage once confirmed clean. Send a “cleaning complete” notice to residents with any new disposal reminders. Document the service date, products used, and before-after photos. Post-cleaning inspection confirms quality. Resident notification closes the loop. Proper follow-up maintains trust and hygiene.
Comparison Table: Key Preparation Steps Before Chute Cleaning
| Step | Timeframe Before Cleaning | Responsible Party | Main Purpose | Common Mistake to Avoid | Impact if Skipped |
| Schedule & Plan | 4–6 weeks | Property Manager | Avoid conflicts & ensure crew availability | Booking too late | Delays & higher emergency rates |
| Notify Residents | 14–21 days (reminders 48–24h) | Property Manager / Staff | Prevent improper use during cleaning | Poor or no notification | Unauthorized use & safety risks |
| Lock Hopper Doors | Day of cleaning | Staff / Security | Isolate chute & prevent debris entry | Leaving doors unlocked | Falling objects & incomplete cleaning |
| Prepare Compactor Room | Day before / morning of | Staff & Cleaning Crew | Safe access & protection of area | Not clearing space | Equipment damage & delays |
| Protect Common Areas | Morning of cleaning | Staff | Prevent water / debris damage | No coverings or signage | Property damage & complaints |
| Coordinate with Crew | Upon arrival | Property Manager | Align expectations & provide access | No on-site meeting | Miscommunication & poor results |
| Monitor Process | During cleaning | Property Manager / Staff | Ensure quality & address issues | No supervision | Missed spots & resident dissatisfaction |
| Post-Cleaning Inspection | Immediately after | Property Manager | Verify cleanliness & document | Skipping final check | Undetected problems & odor return |
How to Communicate the Preparation Plan to Residents
Create a multi-channel communication plan: email blast, building app notification, lobby posters, door hangers, and elevator signs. Use simple language and include visuals (calendar, map of alternative bins). Translate notices into Spanish, Korean, Mandarin, and other common languages. Explain the benefits (better air quality, fewer pests, fire safety). Provide a contact number for questions. Send reminders 1 week, 48 hours, and 24 hours before. Thank residents afterward for cooperation. Clear, repeated communication reduces confusion and misuse. It builds goodwill and ensures smooth execution. Effective resident communication is key to successful preparation.
Use simple language and include visuals (calendar, map of alternative bins). Translate notices into Spanish, Korean, Mandarin, and other common languages. Explain the benefits (better air quality, fewer pests, fire safety). Provide a contact number for questions. Send reminders 1 week, 48 hours, and 24 hours before. Thank residents afterward for cooperation. Clear, repeated communication reduces confusion and misuse. It builds goodwill and ensures smooth execution. Effective resident communication is key to successful preparation.
Conclusion
Preparing a building for garbage chute cleaning requires careful planning, clear communication, and thorough execution to ensure safety, minimal disruption, and maximum cleaning effectiveness. In Los Angeles, where high-rise living is common and health codes are strictly enforced, advance scheduling, resident notification, hopper locking, area protection, and crew coordination are non-negotiable steps. Proper preparation prevents accidents, avoids incomplete cleaning, reduces resident complaints, and ensures compliance with local regulations. Post-cleaning inspection and follow-up communication close the process professionally. When buildings are well-prepared, chute cleaning becomes a routine, low-impact task rather than a chaotic event. Consistent preparation protects health, maintains property value, and improves tenant satisfaction. A structured approach turns this essential maintenance into a seamless operation that benefits everyone in the building. Use simple language and include visuals (calendar, map of alternative bins). Translate notices into Spanish, Korean, Mandarin, and other common languages. Explain the benefits (better air quality, fewer pests, fire safety). Provide a contact number for questions. Send reminders 1 week, 48 hours, and 24 hours before. Thank residents afterward for cooperation. Clear, repeated communication reduces confusion and misuse. It builds goodwill and ensures smooth execution. Effective resident communication is key to successful preparation.
Frequently Asked Questions (FAQs)
1. How far in advance should residents be notified about chute cleaning?
Notify residents at least 14–21 days in advance with reminders at 48 hours and 24 hours before. This gives people time to adjust disposal habits. Include date, time, duration, and alternative trash locations. Clear, repeated notices reduce misuse and complaints.
2. Why is it important to lock all hopper doors during cleaning?
Locking hopper doors prevents residents from adding new waste while cleaning is in progress. It protects the crew from falling debris and ensures the chute remains isolated. Unlocked doors can cause safety hazards and incomplete cleaning. Locking is a critical safety step.
3. What should be done with the compactor or dumpster before cleaning?
Remove the trash bin or compactor drawer to allow full access to the chute bottom. Cover floors and equipment with plastic sheeting to protect from water and debris. Ensure good lighting and ventilation in the access area. A prepared compactor room allows efficient, safe cleaning.
4. How should alternative trash disposal be arranged during cleaning?
Set up clearly marked temporary bins in the lobby, parking area, or loading dock. Place directional signs guiding residents to the new location. Provide extra janitorial staff to monitor and empty bins. Communicate alternatives in all notifications. Good planning prevents trash pile-ups and confusion.
5. Should the building manager be present during chute cleaning?
Yes—it is highly recommended to meet the crew, provide access, review the plan, and monitor progress. Presence ensures coordination and quick resolution of any issues. Take photos before and after for records. Active oversight guarantees quality and resident safety.
6. How long should the chute remain locked after cleaning?
Keep hoppers locked until the crew confirms the cleaning is complete and the chute is dry and safe (usually 4–12 hours). Unlock once inspection shows no residual water or debris. Notify residents when service is finished. Proper reopening prevents accidents and premature use.
7. What protective measures should be taken in common areas?
Place ram board or plastic sheeting on floors near chute doors. Use caution tape to block access during cleaning. Post signs directing residents to alternative disposal. Have staff monitor hallways for water or debris. Protection prevents damage and maintains building appearance.
8. How do you handle non-English speaking residents during preparation?
Translate all notices into common languages (Spanish, Korean, Mandarin, etc.). Use simple text and visuals (calendar icons, maps). Include translation in emails, apps, and posted flyers. Consider multilingual staff or interpreters for questions. Clear communication ensures full understanding and cooperation.
9. What documentation should be completed after preparation and cleaning?
Take before-and-after photos of the chute interior and common areas. Keep copies of resident notifications, crew reports, and completion certificates. Record date, time, products used, and any issues. Store records for compliance and insurance purposes. Proper documentation proves due diligence and quality service.
10. How does good preparation affect the overall cleaning results?
Good preparation ensures the chute is fully accessible, no new waste enters, and common areas are protected. It minimizes disruptions and safety risks. Cleaners can work efficiently without interruptions. The result is a more thorough, higher-quality clean with fewer resident complaints. Preparation directly improves outcomes.