Preparing surfaces properly after graffiti removal is the most important step to ensure new paint adheres well, lasts longer, and looks uniform without ghosting or peeling. In Los Angeles, where sun exposure, coastal humidity, and temperature swings are common, poor preparation often causes fresh paint to fail quickly. After graffiti is stripped, the surface may have chemical residue, micro-etching, bare spots, or absorbed oils from markers and spray paint. Thorough cleaning, neutralization, sanding, patching, and priming create the ideal foundation. Skipping any step can lead to visible stains reappearing through new paint or early paint failure. A well-prepared surface saves time, money, and repeated repainting. Good preparation also improves color accuracy and coverage. With the right process, repainted walls and surfaces stay vibrant for many years.
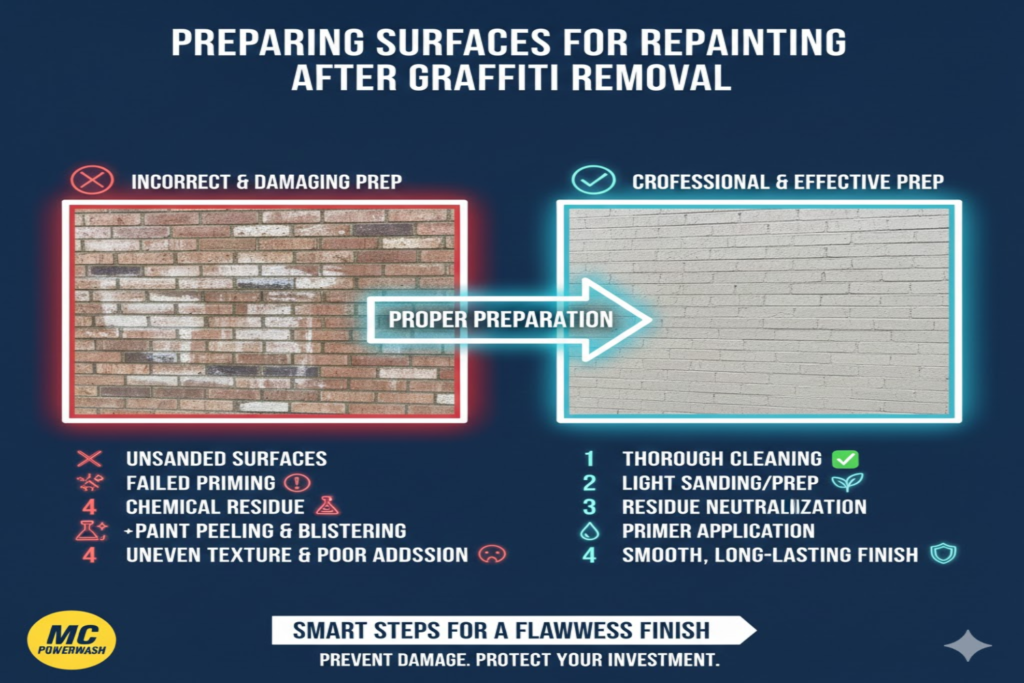
Why Surface Preparation Is Critical After Graffiti Removal
Graffiti removers leave behind alkaline or solvent residues that interfere with paint adhesion. Stripped areas often expose raw, porous material that absorbs paint unevenly. Ghosting occurs when old pigments remain trapped in the substrate and bleed through new coats. In Los Angeles, intense UV rays accelerate paint chalking and fading if the surface is not sealed properly. Unprepared surfaces lead to peeling, cracking, flaking, and costly callbacks. Proper preparation neutralizes chemicals, smooths texture, fills imperfections, and creates a uniform base. It maximizes the life of topcoats and reduces long-term maintenance. Preparation is the difference between a professional finish and a disappointing result. Investing time here prevents expensive failures later.
Assessing the Surface After Graffiti Removal
Inspect the entire area under bright light for residual paint, chemical film, discoloration, or etching. Check for raised edges where old paint meets stripped areas. Feel for rough spots, powdery residue, or slick solvent film. Test pH with litmus paper if strong strippers were used—neutral pH (6.5–8.5) is ideal. Look for hidden graffiti in texture or mortar joints. Note any damage like pitting, spalling, or exposed aggregate on concrete. Photograph before and after preparation for records. Assessment guides which steps are needed. Thorough inspection prevents surprises during painting. It ensures no problem areas are missed.
Cleaning Residual Chemicals and Debris
Rinse the surface thoroughly with a garden hose or low-pressure washer (under 1500 PSI) to remove all stripper residue. Use a mild, pH-neutral detergent (like TSP substitute or Simple Green) and a soft nylon brush to scrub remaining film. Rinse multiple times until water runs clear and feels non-slippery. For concrete and masonry, use a wet vacuum to extract deep moisture and debris. On metal surfaces, wipe with denatured alcohol after rinsing. Allow the surface to dry completely (24–72 hours depending on humidity). Complete rinsing prevents paint lifting or bubbling. Clean surfaces accept primer and paint evenly. This step is non-negotiable for durability.
Neutralizing Chemical Removers
- If alkaline strippers (high pH) were used, neutralize with a mild acid wash (diluted white vinegar or commercial neutralizer).
- Apply, let fizz, then rinse repeatedly until pH is neutral.
- For solvent-based strippers, wipe with mineral spirits or denatured alcohol, then rinse with water.
- Test pH with strips after neutralizing.
- Neutral surfaces prevent chemical reactions with primer or paint.
- In Los Angeles, where humidity can slow drying, extra rinsing cycles may be needed.
- Neutralization stops bleed-through and adhesion problems.
- It protects both the substrate and new coatings.
- Always confirm neutrality before proceeding.
Sanding and Smoothing the Surface
Lightly sand glossy or rough areas with 120–150 grit sandpaper to create a slight tooth for better adhesion. Feather edges where old paint meets bare spots so transitions are invisible. Use a sanding pole for walls and a sanding block for flat areas. Remove sanding dust with a tack cloth or shop vacuum. For textured stucco or brick, avoid heavy sanding—focus on raised edges only. Sanding removes loose material and creates uniform texture. It prevents visible brush or roller marks. Wear a dust mask and eye protection. Proper sanding ensures a smooth final finish. It is essential for high-quality repainting.
Patching Cracks, Holes, and Damaged Areas
Fill small cracks and holes with a flexible exterior caulk or patching compound (DAP Alex Plus or similar). For larger cracks in concrete, use a concrete patching mix or epoxy filler. Smooth patches with a putty knife and let cure fully. Sand patches lightly once dry to blend with the surface. On stucco, use stucco patch or textured spray to match existing finish. Prime patches before full priming. Patching prevents water intrusion and cracking. It creates a uniform appearance under new paint. Well-patched surfaces look seamless after painting. This step is critical for long-term durability.
Priming the Prepared Surface
Apply a high-quality stain-blocking primer (Kilz Original, Zinsser Bulls Eye 1-2-3, or BIN shellac-based) to seal the surface. Use a brush for edges and a roller for large areas. One heavy coat is usually sufficient, but two thin coats work better on porous concrete. For metal surfaces, use a rust-inhibiting primer. Allow full curing time (4–24 hours depending on product). Primer seals residual pigments, prevents bleed-through, and improves topcoat adhesion. It hides minor color differences. Priming is non-negotiable after graffiti removal. It guarantees a uniform, long-lasting finish.
Choosing the Right Paint for Repainting
Select 100% acrylic exterior paint for walls and masonry—it resists moisture and UV damage best. For metal surfaces, use rust-inhibitive enamel or direct-to-metal paint. Choose mildew-resistant formulas for humid coastal areas. Flat or low-sheen hides imperfections better on textured surfaces. Semi-gloss works well on doors and trim. Use dark or bold colors to cover stubborn ghosts if needed. Quality paint (Behr, Sherwin-Williams, Benjamin Moore) lasts longer than budget options. Proper paint selection matches the environment and substrate. It delivers better coverage and durability. Matching primer and paint brands improves performance.
Application Techniques for Even Coverage
- Apply paint in thin, even coats using the “cut in then roll” method.
- Cut in edges with a brush, then roll in W or M patterns to avoid lap marks.
- Maintain a wet edge to prevent visible lines.
- Use extension poles for high areas.
- Apply two full coats for best opacity and protection.
- Work in shade or during cooler parts of the day in Los Angeles to avoid fast drying.
- Back-roll textured surfaces for even coverage.
- Proper technique ensures uniform color and film thickness.
- It prevents peeling and fading.
- Quality application maximizes paint performance.
Drying and Curing Times to Follow
Allow primer to cure fully (usually 4–24 hours) before topcoating. Apply second coat of paint 2–4 hours after the first (check product label). Full cure takes 7–30 days depending on temperature and humidity. Avoid rain or heavy dew during the first 48 hours. In warm, dry conditions curing is faster but avoid direct sun during application. Proper curing develops maximum hardness and adhesion. Rushing causes soft spots and early failure. Patience during drying delivers professional results. It ensures long-term durability. Follow manufacturer guidelines exactly.
Weather Considerations for Repainting in Los Angeles
Avoid painting when temperatures are below 50°F or above 90°F. Ideal range is 60–85°F with low humidity. Check forecast for 48 hours of dry weather after application. Coastal fog can extend drying times—plan accordingly. Paint in early morning or late afternoon to avoid peak sun. Protect fresh paint from direct sunlight and wind-blown dust. Proper timing prevents blistering, wrinkling, or poor adhesion. Weather-appropriate scheduling maximizes paint performance. It reduces callbacks and touch-ups. Planning around local conditions is essential.
Common Mistakes to Avoid During Preparation
Skipping neutralization leaves chemical residue that lifts new paint. Inadequate rinsing causes bubbling or peeling. Over-sanding damages texture or exposes substrate. Using interior primer outdoors leads to rapid failure. Applying paint too thick creates runs and uneven curing. Ignoring dew point causes moisture entrapment. Rushing drying times results in soft film. Avoiding mistakes ensures a durable finish. Each step builds on the previous one. Careful preparation prevents most paint failures.
Tools and Materials Checklist for Preparation
Gather drop cloths, painter’s tape, plastic sheeting, and buckets for protection. Collect pH test strips, mild detergent, stiff nylon brushes, and pressure washer (if needed). Stock sandpaper (120–220 grit), tack cloths, and patching compounds. Purchase high-quality stain-blocking primer and exterior paint. Have rollers, brushes, extension poles, and trays ready. Include gloves, goggles, masks, and respirators for safety. Organize tools before starting. A complete checklist prevents delays. It ensures nothing is overlooked. Proper equipment makes preparation smoother and more effective.
Comparison Table: Preparation Steps After Graffiti Removal
| Step | Purpose | Time Required | Cost Level | Difficulty | Impact on Final Result | Recommended Tools/Materials | Common Mistake to Avoid |
| Thorough Rinsing | Remove chemical residue | 1–4 hours | Low | Easy | Very High | Hose, mild detergent, soft brush | Leaving slippery film |
| pH Neutralization | Prevent paint lifting | 30 min–2 hours | Low | Easy | Very High | Vinegar or neutralizer, pH strips | Skipping on alkaline strippers |
| Sanding & Feathering | Create uniform texture | 1–6 hours | Low | Moderate | High | 120–220 grit sandpaper, pole sander | Over-sanding texture |
| Patching & Filling | Repair cracks and holes | 2–12 hours | Medium | Moderate | Very High | Caulk, concrete patch, stucco mix | Not feathering edges |
| Stain-Blocking Primer | Seal & block ghosts | 2–8 hours | Medium | Easy | Critical | Kilz, Zinsser, BIN, roller/brush | Using cheap or interior primer |
| Two-Coat Top Paint Application | Achieve full coverage & protection | 4–12 hours | High | Moderate | Critical | 100% acrylic exterior paint | Rushing recoat time |
How to Test Preparation Quality Before Painting
Sprinkle water on the surface—if it beads evenly, the surface is clean and ready for primer. Apply a small test patch of primer and paint, then check for bubbling, lifting, or color bleed after 24 hours. Use a flashlight at an angle to spot any gloss differences or residue. Test adhesion by pressing strong tape on cured paint and pulling—if no paint lifts, preparation is good. Proper testing catches problems early. It prevents large-scale failures. A few minutes of testing saves hours of repainting. Always test on prepared areas. Quality checks ensure professional results.
Conclusion
Preparing surfaces for repainting after graffiti removal is a multi-step process that directly determines paint longevity and appearance. Thorough rinsing, neutralization, sanding, patching, priming, and proper application create a flawless foundation. In Los Angeles, where UV exposure and temperature changes challenge paint performance, meticulous preparation is especially important. Skipping steps leads to peeling, ghosting, and premature failure. Use quality materials, follow drying times, and work in suitable weather for best results. Whether repainting stucco walls, concrete, or metal, careful preparation saves time and money long-term. With the right techniques, repainted surfaces look better than new and resist future graffiti better. Proper preparation turns a difficult restoration into a lasting improvement.
Frequently Asked Questions (FAQs)
1. How soon after graffiti removal can I start repainting?
Wait until the surface is completely dry and all chemical residue is rinsed away—usually 24–72 hours. Test for dryness by taping plastic over a section overnight—if no condensation forms underneath, it is ready. Neutralize and prime as soon as possible after drying. Rushing leads to poor adhesion and paint failure.
2. Will stain-blocking primer cover graffiti ghosts completely?
High-quality stain-blocking primers (Kilz Original, Zinsser Bulls Eye, or shellac-based BIN) block most ghosts effectively. For very dark or stubborn stains, two coats of primer may be needed. Shellac-based primers are the strongest for bleed-through. Proper priming prevents old colors from showing through.
3. Should I sand the entire wall after graffiti removal?
Light sanding of rough or glossy spots is enough—focus on transition areas and raised edges. Full-wall sanding is unnecessary and can damage texture. Feather any stripped spots so they blend smoothly. Sanding creates tooth for better adhesion. Over-sanding is a common mistake.
4. What type of primer is best after chemical graffiti removal?
Use a high-performance stain-blocking primer like Zinsser Bulls Eye 1-2-3 or Kilz Original. For heavy ghosting, shellac-based primers (BIN) are strongest. Oil-based or bonding primers work well on slick or metal surfaces. Choose exterior-grade for outdoor work. Primer choice is critical for success.
5. How do I repair damaged stucco after graffiti removal?
Patch small areas with stucco repair mix or textured caulk. For larger damage, apply stucco patch and texture with a spray or trowel to match existing finish. Prime patches before full painting. Work in thin layers to avoid cracking. Proper patching makes repairs invisible after painting.
6. Can I paint directly over neutralized graffiti areas without primer?
No—primer is essential to seal the surface and block residual pigments. Skipping primer often causes bleed-through, poor adhesion, and uneven finish. Always use stain-blocking primer after graffiti removal. It guarantees a uniform, long-lasting result.
7. How many coats of paint do I need after graffiti removal?
Two full coats of high-quality exterior paint are recommended for full coverage and protection. One coat may suffice on primed surfaces with light colors, but two coats ensure durability and hide imperfections. Thin coats dry better and last longer. Multiple coats deliver professional results.
8. What weather conditions are best for repainting in Los Angeles?
Paint when temperatures are 60–85°F with low humidity and no rain forecast for 48 hours. Avoid direct sun, high winds, or coastal fog during application. Early morning or late afternoon work helps control drying. Proper timing prevents blistering and wrinkling.
9. Will new paint prevent future graffiti from sticking?
High-quality 100% acrylic paint with mildew-resistant additives makes surfaces less porous and easier to clean. Adding anti-graffiti sacrificial coatings provides the best protection. Regular maintenance and quick removal deter repeat tagging. Paint alone helps but is not a complete barrier.
10. How long should I wait between primer and topcoat?
Follow the primer label—most require 4–24 hours before recoating. In warm, dry conditions, recoat sooner; in cool or humid weather, wait longer. Test tackiness before topcoating. Proper recoat timing ensures maximum adhesion and durability. Rushing this step causes peeling.