Stamped concrete is a masterpiece of modern hardscaping. By combining the structural strength of a steel-reinforced concrete slab with the intricate textures of slate, cobblestone, or European fan patterns, it offers a high-end aesthetic that can transform a standard backyard into a luxury retreat. However, there is a fundamental paradox at play: while the concrete itself is rock-hard, the decorative finish—the color, the texture, and the protective gloss—is remarkably sensitive.
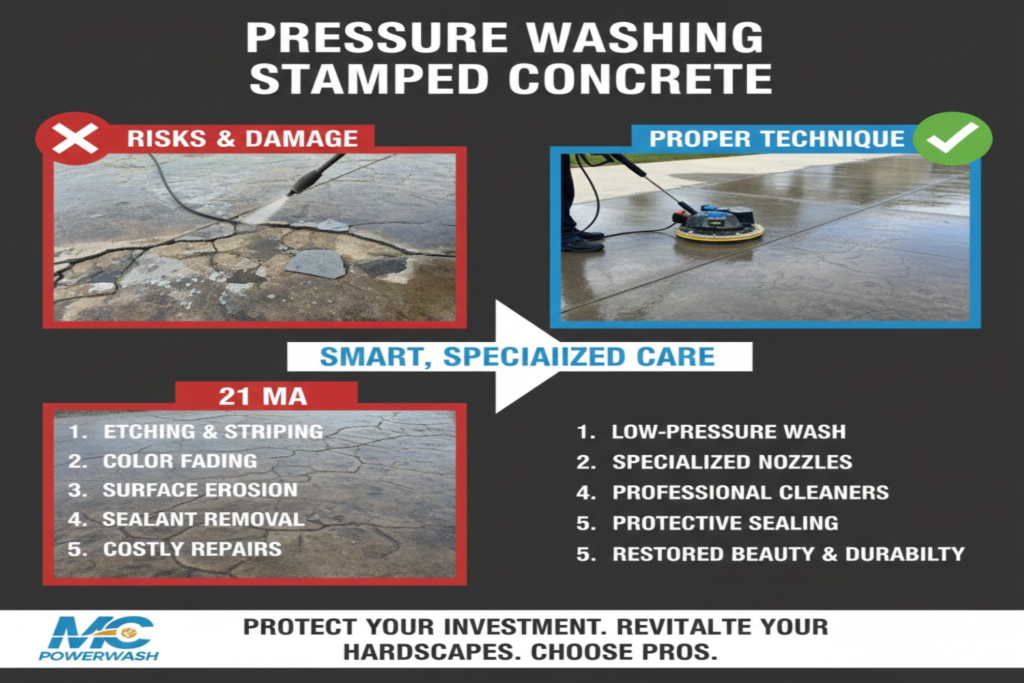
Many homeowners treat stamped concrete the same way they treat a standard gray sidewalk, pulling out a commercial-grade pressure washer and “blasting” away. This is a $20,000 mistake. Standard pressure washing techniques (often exceeding 3,000 PSI) can strip the decorative “release agents” and etch the surface in minutes, leaving you with a patchy, dull, and structurally vulnerable patio. To preserve this surface, one must adopt a “Low-PSI” philosophy, focusing on chemical cleaning and gentle rinsing rather than raw mechanical force.
2. Understanding Your Surface: What’s Under the Grime?
Before you pull the trigger, you must understand the chemistry of your patio. Stamped concrete is not “just concrete”; it is a multi-layered system.
Topical Colors vs. Integral Colors: Most stamped concrete uses Integral Color (liquid pigment mixed into the concrete), but the “wow factor” comes from the Antiquing Release Agent. This is a secondary color—usually a powder or liquid—that settles into the “cracks” and “grout lines” of the stamp pattern to create a realistic, multi-toned look. High pressure can blast this secondary color right out of the crevices, leaving your “slate” patio looking like a flat, monochromatic sheet of plastic.
The Sealer Barrier: Unlike standard concrete, stamped concrete must be sealed. When you wash a stamped patio, you aren’t actually cleaning the concrete; you are cleaning the acrylic sealer. If that sealer is compromised by high pressure, the concrete underneath becomes exposed to the elements, leading to rapid fading and “spalling” (surface flaking).
The Porosity Factor: Even though it is sealed, stamped concrete has “texture” where water can pool. If you force water into the microscopic pores using high pressure, you can trap moisture between the concrete and the sealer. In the Southern California sun, this trapped moisture turns to steam, causing the sealer to turn a cloudy, milky white—a condition known as “blushing.”
3. The PSI Sweet Spot: Why Less is More
In the world of decorative concrete, 1,500 to 2,000 PSI is the “Golden Range.” Anything higher risks permanent damage to the finish.
The PSI Rule: Professional contractors rarely use the full power of their machines on stamped surfaces. By dialing back the pressure to roughly 1,500 PSI, you provide enough agitation to move dirt without the risk of “stripping” the color-rich cream coat of the cement.
Nozzle Selection: The White Tip (40-degree) is the standard for stamped concrete. It provides a wide, gentle fan that distributes the impact. The Green Tip (25-degree) should only be used sparingly for specific, stubborn spots, and only if the sealer is in perfect condition. Never, under any circumstances, use a Red ($0^\circ$) or Yellow ($15^\circ$) tip on decorative concrete.
The 12-Inch “Safety Zone”: Distance is your best friend. Always maintain at least 12 inches between the nozzle and the surface. Getting too close (even with a wide tip) can create “zebra stripes”—permanent lines where the high-velocity water has etched the sealer.
4. Pre-Wash Inspection: Identifying Vulnerabilities
A professional-grade job begins with a thorough “walk-around.” You need to identify where the surface is already failing so you don’t make it worse.
Checking for Delamination:
Look for areas where the sealer is peeling, flaking, or “bubbling.” If you hit these areas with a pressure washer, the water will get under the sealer and peel it off like a sunburned layer of skin. These spots require a “Soft Wash” (soap and garden hose) only.
Managing Hairline Cracks:
Even in Los Angeles, where we don’t face “Deep Freeze” cycles, forcing high-pressure water into hairline cracks is dangerous. This can erode the sub-base under the concrete, leading to hollow spots and eventual cracking.
The “Efflorescence” Check:
Do you see a white, powdery substance on the surface? This is Efflorescence—natural salts migrating out of the concrete. Wetting this with high pressure can actually drive the salt back into the stone, only for it to return twice as thick. Efflorescence should be treated with a specific pH-neutral remover before the general wash begins.
5. Cleaning Comparison: Stamped vs. Standard Concrete
| Feature | Standard (Gray) Concrete | Stamped (Decorative) Concrete |
| Max Recommended PSI | 3,000 – 4,000 PSI | 1,200 – 2,000 PSI |
| Nozzle Choice | 15° (Yellow) or 25° (Green) | 40° (White) or Wide Fan |
| Chemical Requirement | Strong Degreasers/Acids | pH-Neutral Soaps Only |
| Cleaning Method | Mechanical Scouring | Chemical Agitation + Soft Rinse |
| Sealing Frequency | Optional (Every 5 years) | Required (Every 2–3 years) |
6. Chemical Selection: The “pH-Neutral” Requirement
Since you are cleaning a protective acrylic film (the sealer), you must avoid “aggressive” chemistry.
The Acid Prohibition:
Never use Muriatic Acid, Vinegar, or aggressive “Brighteners” on stamped concrete. These acids will eat through the sealer and react with the lime in the concrete, permanently altering the color and “eating” the texture.
The Power of Oxygen Bleach:
For the black mold or green algae often found in shaded North-facing patios, Sodium Percarbonate (Oxygen Bleach) is the ideal tool. It is powerful enough to kill organic growth but gentle enough not to strip the sealer or kill your surrounding Southern California landscape.
Degreasers for the “Gloss Look”:
If you have oil spots or food stains near a BBQ island, use a high-quality, pH-neutral degreaser. Apply it at a 1:10 dilution, let it dwell for 10 minutes, and use a soft-bristle deck brush to agitate. This removes the grease without “dulling” the high-gloss finish of the sealer.
7. The Step-by-Step Restoration Process
Follow this professional workflow to ensure a deep clean without compromising the decorative integrity of your patio.
Step 1: The Dry Prep
Before a drop of water touches the surface, you must remove all loose abrasive material. Sand, small pebbles, and dried leaf matter act like sandpaper when pushed around by a high-pressure stream. Use a soft-bristle push broom or a leaf blower to clear the area completely. Pay special attention to the deep “grout lines” of the stamp pattern where debris loves to hide.
Step 2: The Soft Soak
In the Los Angeles sun, concrete acts like a heat sink. If you apply cool water or cleaning chemicals to a scorching hot slab, you risk “thermal shock” or flash-drying. Use a standard garden hose to pre-wet the entire surface. This lowers the surface temperature and ensures your cleaning agents stay in a liquid state longer, allowing them to work effectively.
Step 3: The Low-Pressure Pass
Equipped with your 40-degree (White) nozzle, begin your pass. Use a sweeping motion, keeping the wand at a consistent 12 to 18 inches from the surface. Always work with the grain of the stamp pattern. If your pattern mimics wood planks, sweep along the “boards.” This prevents water from getting trapped under the edges of the texture.
Step 4: The Detail Scrub
For areas with heavy moss or deep-set grime in the textures, pressure alone isn’t the answer. Use a soft-bristle deck brush and a pH-neutral soap to manually agitate the area. This “mechanical agitation” is far safer than increasing the PSI of your machine.
8. [Bullet Points Section] Common Mistakes That Ruin Stamped Concrete
- The “Stop-and-Go” Mark: Never stop moving the wand while the trigger is pulled. If you pause for even a second, the concentrated stream will leave a circular “etch mark” in the sealer. Always start your sweep off the concrete and move onto it in a fluid motion.
- Over-Cleaning: Stamped concrete is not a kitchen floor; it shouldn’t be pressure washed monthly. Excessive washing wears down the protective sealer and eventually the antiquing release agents. Aim for a professional deep clean once or twice a year at most.
- Metal Shovels & Scrapers: During cleaning or winter maintenance, never use metal tools. A metal scraper will gouge the acrylic sealer and can chip the delicate edges of the stamp pattern, leading to permanent structural and aesthetic damage.
9. Post-Wash Maintenance: The “Sealing Window”
The wash is only the first half of the restoration. Stamped concrete relies on its sealer for its “pop” and protection.
- The 24-48 Hour Rule: Never seal damp concrete. In the humid coastal air of Santa Monica or Long Beach, moisture can stay trapped in the pores of the concrete even if the surface looks dry. You must wait at least 24 to 48 hours after washing before applying sealer to avoid a “milky” or “cloudy” finish.
- The “Water Bead Test”: Not sure if you need a re-seal? Pour a cup of water on the dry concrete. If it beads up like water on a freshly waxed car, your sealer is intact. If the concrete darkens and absorbs the water, your protection is gone, and a re-seal is mandatory.
- Choosing the Right Finish: * High-Gloss (Wet Look): Popular in SoCal for that “resort” feel. It darkens the stone and makes colors vibrant.
- Matte/Natural Finish: Better for a rustic, understated look that hides scratches and wear more effectively.
10. Environmental and Safety Considerations
- Protecting Poolside Landscaping: Many stamped patios surround pools. Ensure your cleaning runoff doesn’t enter the pool (which can mess with pH levels) or drown adjacent succulents in soapy water. Use a wet-vac to “reclaim” runoff near the pool edge.
- Slip-and-Fall Hazards: Stamped concrete is notoriously slippery when wet, and adding soap makes it like an ice rink. Always wear high-traction boots and warn others to stay off the area until it is completely dry.
- Anti-Skid Additives: If your patio is a high-traffic pool deck, ask your contractor to add “Shark Grip” or a similar anti-skid polymer to the sealer. It provides an invisible “grit” that dramatically increases safety without ruining the look.
11. Conclusion: Preserving the Masterpiece
Stamped concrete is a significant investment that defines the curb appeal of your home. Treating it with “industrial” force is the fastest way to turn a luxury asset into a maintenance nightmare. By adopting a Soft Wash approach, using the right chemistry, and respecting the “Sealing Window,” you ensure that your patio remains as vibrant and beautiful as the day it was poured.
Remember: in the world of decorative concrete, finesse always beats force. A well-maintained stamped patio isn’t just a slab of stone; it’s the stage for your outdoor life in Southern California.
11. FAQs: Expert Answers for Homeowners
Q: Can I use a surface cleaner (spinning disk) on stamped concrete?A: Generally, no. Surface cleaners are designed for flat, gray concrete. On stamped surfaces, the spinning bar can “hit” the high points of the texture, causing uneven wear or chipping. Stick to a wand for decorative surfaces.
Q: How do I remove oil stains without losing the color?A: Use a pH-neutral degreaser and a soft brush. Avoid “Purple Power” or heavy industrial solvents which can “eat” the sealer and the release agent color.
Q: What if the color looks “faded” after I wash it?A: Most of the time, the concrete isn’t faded; the sealer is just old and dull. A fresh coat of “Wet Look” sealer acts like a “clear coat” on a car—it refracts light and brings the original pigment back to life instantly.